Bekendstelling
Leaky toilets, wobbly seats, and improper sealing—these are the nightmares that keep homeowners and contractors up at night. Did you know that improper sealing is the #1 cause of toilet leaks after installation? It’s a small detail that can lead to big headaches and costly repairs down the line.
Whether you’re a DIY enthusiast or a professional plumber, installing a ceramic toilet correctly is crucial for ensuring long-term functionality and avoiding water damage. This step-by-step guide will walk you through the process, highlighting essential tools, preparation steps, and “Pro -wenke” to help you achieve a rock-solid, leak-free installation. We’ll also cover common pitfalls to avoid, so you can tackle this home improvement project with confidence and precision.
Introduction to Ceramic Toilet Installation
Are you looking to upgrade your bathroom with a sleek new keramiek toilet? Whether you’re a seasoned DIYer, a professional contractor, or a homeowner tackling your first renovation project, understanding how to install a ceramic toilet properly is crucial. As a Technical Sales Manager at MFBath with over a decade of industry experience, I’m here to guide you through this process and help you avoid common pitfalls.
“Proper ceramic toilet installation is essential for preventing leaks, ensuring longevity, and maintaining the aesthetic appeal of your bathroom.”
Let’s dive into why proper installation matters and what you can expect from this comprehensive guide on how to install a ceramic toilet.
Why Proper Installation Matters: Avoiding Leaks and Damage
Installing a ceramic toilet might seem straightforward, but there’s more to it than meets the eye. A poorly installed toilet can lead to a host of problems, including water leaks, floor damage, and even structural issues. By following a step-by-step guide to install a ceramic toilet, you’ll ensure a watertight seal and prevent costly repairs down the line.
Benefits of Ceramic Toilets: Durability and Aesthetics
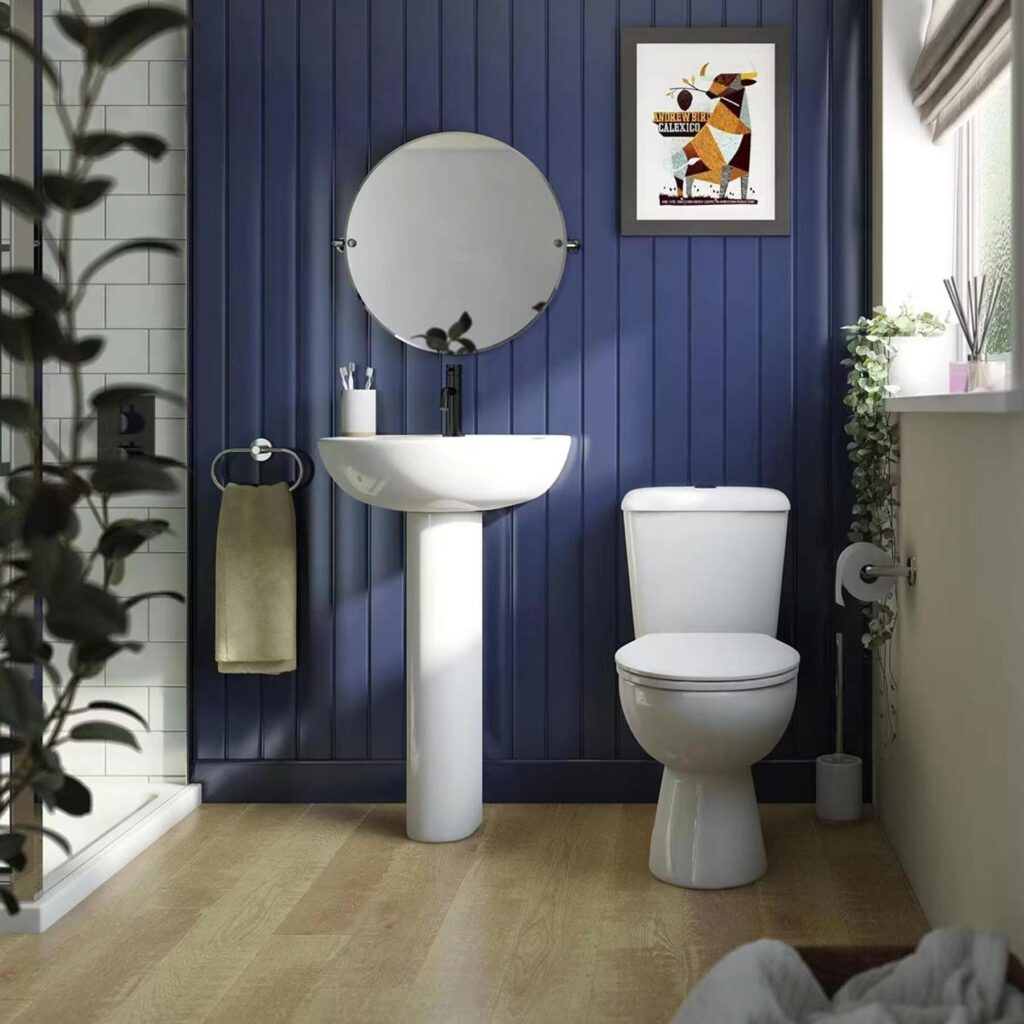
Ceramic toilets are a popular choice for good reason. They’re durable, easy to clean, and come in a variety of stylish designs. At MFBath, we offer a wide range of ceramic toilets that combine functionality with “eye-catching” aesthetics. Whether you’re looking for a sleek one-piece model or a traditional two-piece design, our ceramic toilet installation guide will help you make the most of your new fixture.
Who This Guide Is For: Homeowners, Contractors, and DIYers
This ceramic toilet installation guide is designed for everyone from first-time DIYers to experienced contractors. We’ll break down the process into easy-to-follow steps, highlight common mistakes to avoid, and provide pro tips that even seasoned professionals will find useful. Whether you’re installing a toilet for the first time or looking to refine your technique, you’ll find valuable insights here.
What to Expect: Tools, Steps, and Pro Tips Ahead
In the following chapters, we’ll cover everything you need to know about how to install a ceramic toilet. From the tools you’ll need to the final touches, we’ve got you covered. You’ll learn about proper measurements, wax ring installation, and how to ensure a level fit. We’ll also address common issues and provide troubleshooting tips to ensure your installation goes smoothly.
At MFBath, we’re committed to providing not just high-quality ceramic toilets, but also the knowledge to install them correctly. Our range of installation kits and accessories are designed to make the process as seamless as possible, whether you’re a DIY enthusiast or a professional contractor.
So, grab your tools and let’s get started on your ceramic toilet installation journey. With this guide, you’ll be well-equipped to tackle the task with confidence and achieve professional-quality results.

Tools and Materials You’ll Need
Before you embark on your ceramic toilet installation journey, it’s crucial to gather all the necessary tools and materials. As an experienced Technical Sales Manager at MFBath, I’ve seen firsthand how being well-prepared can make the difference between a smooth installation and a frustrating experience. Let’s dive into what you’ll need to successfully install a ceramic toilet.
“Having the right tools and materials on hand is the first step in ensuring a successful and leak-free ceramic toilet installation.”
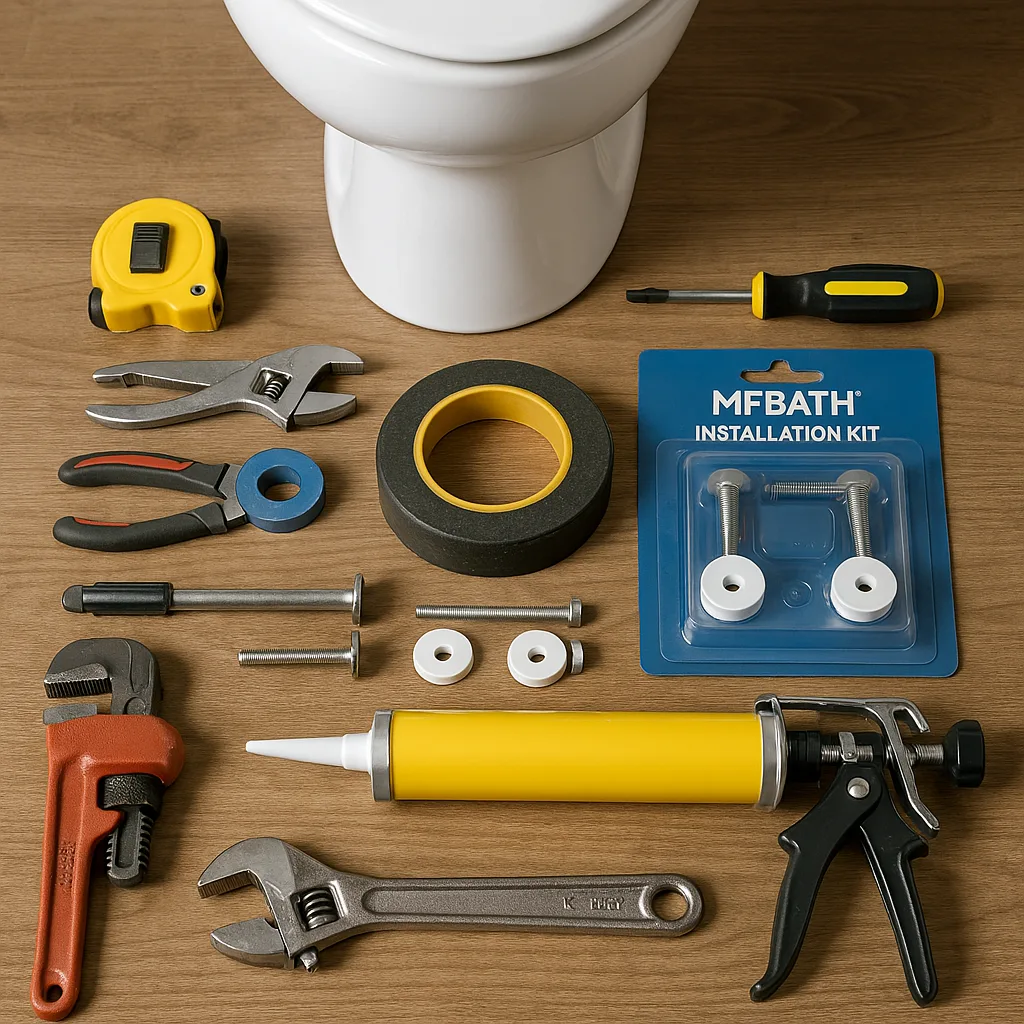
Essential Tools: Wrench, Screwdriver, Level, and More
When it comes to toilet installation steps, having the right tools is non-negotiable. Here’s a list of essential tools you’ll need:
| Tool | Purpose | Type | Alternative | Importance Level |
|---|---|---|---|---|
| Adjustable Wrench | Tightening bolts and nuts | 12-inch | Pipe Wrench | Critical |
| Screwdriver | Securing toilet seat | Phillips head | Multi-bit Screwdriver | Essential |
| Level | Ensuring toilet is even | 2-foot level | Smartphone App | Very Important |
| Putty Knife | Removing old wax ring | Flexible blade | Scraper | Useful |
| Hacksaw | Cutting bolts if needed | Fine-toothed | Bolt Cutter | Optional |
Remember, using the right tools not only makes the job easier but also helps prevent damage to your new ceramic toilet.
Must-Have Materials: Wax Ring, Bolts, and Sealant
Now that we’ve covered the tools, let’s look at the materials you’ll need for how to install a ceramic toilet:
- Wax Ring: This creates a watertight seal between the toilet and the floor flange.
- Toilet Bolts: These secure the toilet to the floor.
- Silicone Sealant: Used to seal the base of the toilet to the floor.
- Supply Line: Connects the toilet to the water supply.
- Toilet Seat: Unless your toilet comes with one, you’ll need to purchase separately.
At MFBath, we offer comprehensive installation kits that include all these materials, ensuring compatibility and quality.
Optional Add-Ons: Caulk Gun and Spare Parts
While not strictly necessary, these items can make your installation “Gladde seil”:
- Caulk Gun: For applying silicone sealant neatly.
- Spare Wax Ring: In case of mistakes during installation.
- Shims: To level the toilet if your floor isn’t perfectly even.
- Toilet Flange Repair Kit: In case your existing flange is damaged.
Where to Source: Retail vs. Manufacturer Kits
When it comes to sourcing your tools and materials, you have two main options:
- Retail Stores: Local hardware stores offer individual tools and materials.
- Manufacturer Kits: Companies like MFBath provide comprehensive installation kits.
While retail stores offer flexibility, manufacturer kits like those from MFBath ensure compatibility and often include toilet installation tips. Our kits are designed to make the process as smooth as possible, even for first-time installers.
By ensuring you have all these tools and materials ready, you’re setting yourself up for success. In the next chapter, we’ll dive into the step-by-step process of installing your ceramic toilet. Remember, if you’re ever unsure about what tools do I need to install a ceramic toilet, MFBath’s customer support and FAQs are always here to help.
Preparing Your Bathroom for Installation
Before you dive into how to install a ceramic toilet, proper preparation is key. As a seasoned Technical Sales Manager at MFBath, I’ve seen firsthand how a well-prepared space can make all the difference in achieving a smooth, leak-free installation. Let’s walk through the essential steps to set you up for success in your home improvement project.
“Thorough preparation is the foundation of a successful ceramic toilet installation, preventing future issues and ensuring a stable, long-lasting fixture.”
Shutting Off the Water Supply Safely
The first crucial step in installing a toilet is to shut off the water supply. Here’s how:
- Locate the shutoff valve, typically found near the base of the toilet.
- Turn the valve clockwise until it’s fully closed.
- Flush the toilet to drain the tank and bowl.
- Disconnect the water supply line from the tank.
Remember, if you encounter any issues with the shutoff valve, MFBath’s customer support is always available to guide you through troubleshooting or sourcing replacement parts.
Removing the Old Toilet: Step-by-Step
Now that the water’s off, let’s remove the old toilet:
- Unscrew the nuts at the base of the toilet.
- Gently rock the toilet to break the wax seal.
- Lift the toilet straight up and set it aside.
- Remove the old wax ring and clean the flange area.
This process sets the stage for how to install a ceramic toilet correctly, ensuring a clean slate for your new fixture.
Inspecting and Cleaning the Flange
The flange is crucial for a secure, leak-free installation. Here’s what to do:
| Flange Condition | Action Required | Tools Needed | Geskatte tyd | Skill Level |
|---|---|---|---|---|
| Good Condition | Clean thoroughly | Putty knife, wire brush | 10-15 minute | Beginner |
| Slightly Damaged | Install repair kit | Screwdriver, pliers | 30-45 minutes | Intermediate |
| Severely Damaged | Replace flange | Hacksaw, screwdriver, wrench | 1-2 hours | Gevorderd |
| Incorrect Height | Add flange extender | Screwdriver, level | 20-30 minutes | Intermediate |
| Loose in Floor | Secure with new screws | Power drill, screwdriver | 15-20 minutes | Beginner |
If you’re unsure about your flange’s condition, don’t hesitate to reach out to MFBath’s support team. We can guide you on how to fix toilet installation issues related to the flange.
Prepping the Space: Clearing and Leveling
The final preparation step involves creating a clean, level surface:
- Remove any debris from the floor around the flange.
- Check the floor for level using a carpenter’s level.
- If the floor isn’t level, prepare shims to use during installation.
- Ensure the area is dry and free from any moisture.
By taking the time to properly prepare your bathroom, you’re setting yourself up for a successful installation. Remember, at MFBath, we’re committed to supporting you through every step of your “potty project”. Our comprehensive range of products and expert support ensure that installing a toilet becomes a manageable task, even for first-time DIYers.
In the next chapter, we’ll dive into the actual installation process, building on the solid foundation you’ve created through these preparation steps. Stay tuned for more insights on how to make your ceramic toilet installation a success!
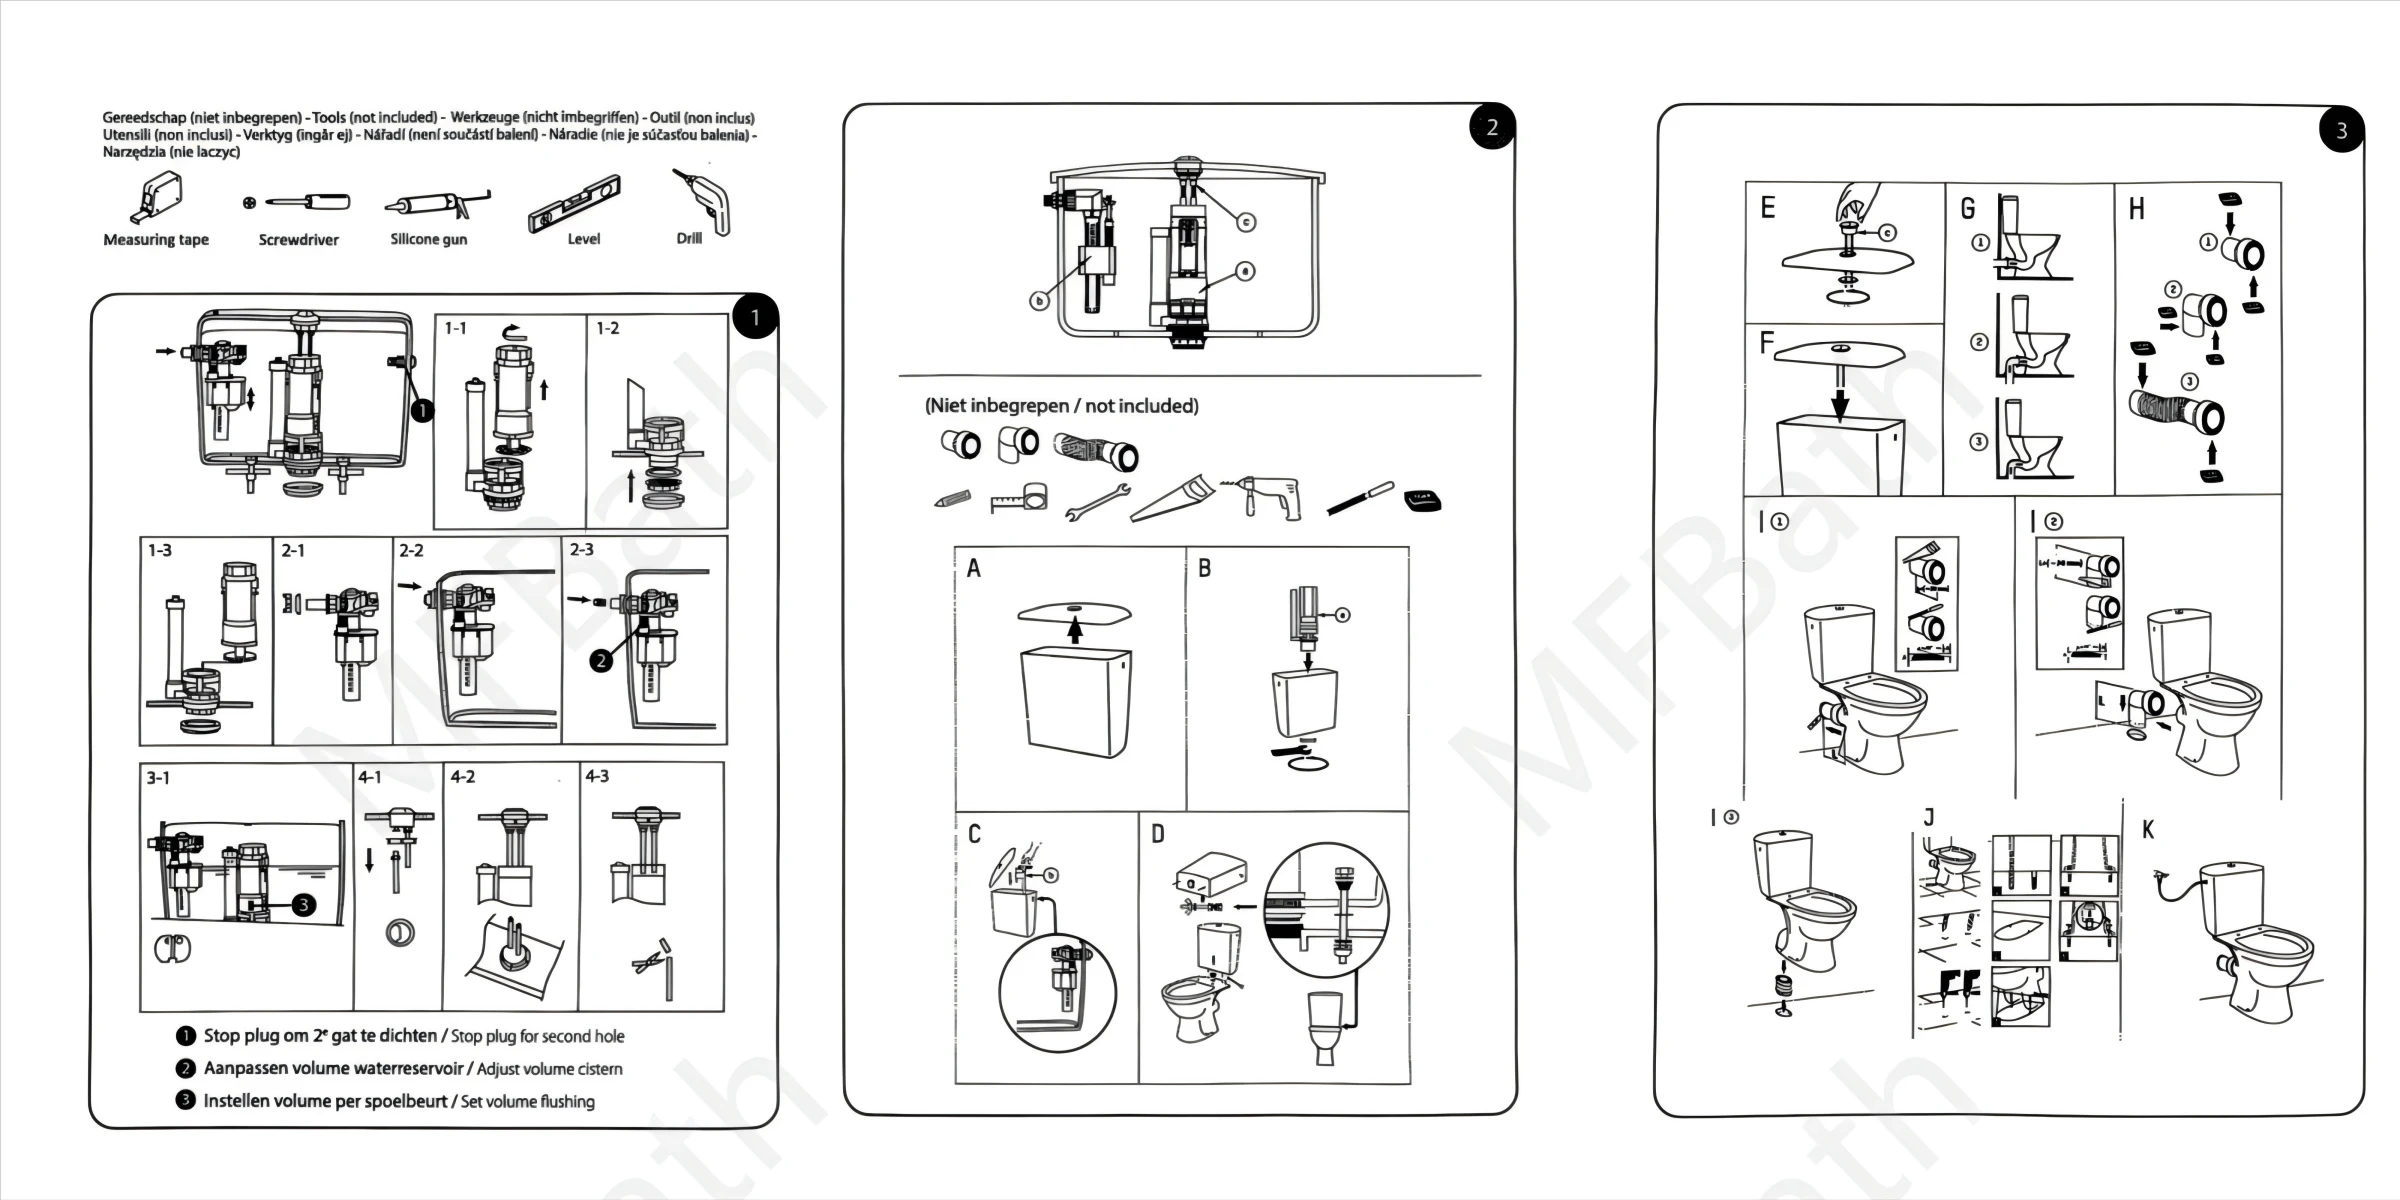
Step-by-Step Ceramic Toilet Installation
Welcome to the heart of our ceramic toilet installation guide. As a Technical Sales Manager at MFBath with years of experience, I’m here to walk you through each crucial step. This comprehensive guide on how to install a ceramic toilet will ensure you achieve a professional-quality result, whether you’re a DIY enthusiast or a seasoned pro.
“Following a detailed, step-by-step process is key to achieving a leak-free and properly functioning ceramic toilet installation.”
Step 1: Securing the Flange and Base
Begin your ceramic toilet installation by ensuring the flange is secure and level:
- Inspect the flange for any damage or loose screws.
- If necessary, replace or repair the flange using a flange repair kit.
- Secure the flange to the subfloor using stainless steel screws.
- Place the new toilet bolts into the flange slots.
Step 2: Positioning the Wax Ring Correctly
The wax ring is crucial for preventing leaks. Here’s how to position it:
- Clean the flange area thoroughly.
- Place the wax ring on the flange, not on the toilet.
- Ensure the wax ring is centered and sitting flat.
Pro tip: For added protection, consider using a wax-free seal, which is more forgiving if you need to adjust the toilet’s position.
Step 3: Setting the Toilet and Tightening Bolts
Now comes the critical part of how to install a keramiek toilet:
- Carefully lower the toilet onto the flange, aligning the bolts with the holes in the base.
- Sit on the toilet to compress the wax ring and create a seal.
- Add washers and nuts to the bolts, tightening them alternately.
- Be careful not to over-tighten, as this can crack the ceramic.
| Bolt Tightening Step | Torque (inch-pounds) | Common Mistakes | Pro Tips | MFBath Compatibility |
|---|---|---|---|---|
| Initial Tightening | 20-30 | Uneven pressure | Alternate sides | Universal fit |
| Secondary Tightening | 30-40 | Over-tightening | Use torque wrench | Reinforced base |
| Final Check | 40-50 | Ignoring wobble | Slight movement ok | Stability-enhanced design |
| Bolt Trimming | N/A | Cutting too short | Leave 1/4 inch above nut | Bolt cover compatible |
| Cover Installation | Hand-tight | Forcing fit | Align carefully | Snap-on covers available |
Step 4: Connecting the Water Supply
With the toilet securely in place, it’s time to connect the water:
- Attach the fill valve to the tank if it’s not pre-installed.
- Connect the water supply line to the fill valve.
- Tighten the connection with an adjustable wrench, but don’t over-tighten.
- Turn on the water supply and check for leaks.
MFBath toilets are designed for compatibility with standard water connections, making this step straightforward.
Step 5: Sealing the Base with Caulk
The final step in our ceramic toilet installation guide:
- Apply a bead of silicone caulk around the base of the toilet.
- Leave a small gap at the back uncaulked for leak detection.
- Smooth the caulk with a wet finger for a clean finish.
This step-by-step guide to install a ceramic toilet ensures a professional result. Remember, MFBath’s product specifications are designed to make installation “a breeze”, with features that complement standard installation techniques.
By following these toilet installation steps carefully, you’ve greatly reduced the chances of leaks or instability. However, if you encounter any issues or have questions about how to fix toilet installation issues, don’t hesitate to reach out to MFBath’s customer support. We’re here to ensure your ceramic toilet installation is a success from start to finish.
Avoiding Mistakes and Final Checks
Congratulations! You’ve nearly completed your ceramic toilet installation. As a seasoned Technical Sales Manager at MFBath, I’ve seen firsthand the common pitfalls that can turn a smooth DIY project into a plumbing nightmare. Let’s dive into how to avoid these mistakes and ensure your installation is a success.
“The key to a flawless ceramic toilet installation lies not just in following steps, but in understanding and avoiding common mistakes that even experienced DIYers can make.”
Top Mistakes: Over-Tightening Bolts and Skipping the Level
When learning how to install a ceramic toilet, two critical errors often stand out:
- Over-tightening bolts: This can crack the ceramic base, leading to leaks and instability.
- Neglecting to level the toilet: An uneven toilet can cause rocking and potential seal breaks.
To avoid these, use a torque wrench for precise tightening and always double-check with a level before final installation.
Sealing Tips to Prevent Leaks
Proper sealing is crucial for a leak-free installation. Here are some toilet installation tips to ensure a watertight seal:
| Sealing Area | Common Mistake | Correct Method | MFBath Solution | Importance Level |
|---|---|---|---|---|
| Wax Ring | Using old/damaged ring | Use new, quality wax ring | Pre-fitted wax rings | Critical |
| Base Caulking | Full seal around base | Leave small gap at rear | Mold-resistant caulk | Very Important |
| Tank-to-Bowl | Overtightening bolts | Hand-tight + 1/4 turn | Pre-installed gaskets | Important |
| Supply Line | Reusing old line | Install new flexible line | Corrosion-resistant lines | Crucial |
| Flange Seal | Ignoring damaged flange | Repair/replace if needed | Flange repair kits | Essential |
Post-Install Checks: Flush Test and Leak Detection
After installation, it’s crucial to perform these checks:
- Flush Test: Perform multiple flushes to ensure proper water flow and tank refilling.
- Leak Detection: Check for water around the base, under the tank, and at connection points.
- Stability Check: Gently rock the toilet to ensure it’s firmly in place.
- Water Level: Confirm the tank fills to the correct level.
These steps are crucial in how to install a ceramic toilet correctly and avoid future issues.
When to Call a Pro: Troubleshooting Tips
While DIY toilet installation can be rewarding, knowing when to seek professional help is equally important. Consider calling a pro if you encounter:
- Persistent leaks despite rechecking all connections
- Uneven flooring that complicates leveling
- Damaged or outdated plumbing that requires extensive work
- Cracks or damages to the ceramic during installation
Remember, MFBath offers plumber assistance and comprehensive support resources. Don’t hesitate to reach out if your DIY efforts hit a “roadblock”. Our team is here to ensure your ceramic toilet installation is a success, whether you complete it yourself or need professional intervention.
By avoiding these common mistakes when installing a ceramic toilet and performing thorough final checks, you’re ensuring a leak-free, stable, and properly functioning toilet. MFBath’s commitment to quality extends beyond our products to the support we provide our customers throughout their installation journey.
Konklusie
As we wrap up this guide on ceramic toilet installation, I can’t stress enough how crucial proper installation is for long-term satisfaction. After years in the industry, I’ve seen firsthand how a well-installed toilet can make all the difference in a bathroom’s functionality and aesthetics.
Remember, taking the time to prepare, follow each step carefully, and perform those final checks isn’t just about avoiding leaks—it’s about ensuring your new ceramic toilet serves you well for years to come. Whether you’re a DIY enthusiast or a seasoned pro, the key is patience and attention to detail.
At MFBath, we’re committed to not just providing top-quality ceramic toilets, but also ensuring you have the knowledge to install them correctly. So go ahead, tackle that installation with confidence—you’ve got this! And if you ever hit a “snag”, remember we’re here to help. Here’s to leak-free, wobble-free toilets and bathrooms that work as great as they look!
Vrae
-
Q1: What are the steps to install a ceramic toilet?
A1: To install a ceramic toilet, first ensure the area is clean and level. Secure the flange to the floor, place a wax ring on the flange, and carefully position the toilet bowl over the wax ring. Secure the bowl with bolts and connect the tank. Finally, test for leaks and ensure everything is tightened.
-
Q2: What tools do I need to install a ceramic toilet?
A2: You will need a few essential tools, including a wrench, adjustable pliers, a level, a wax ring, and a screwdriver. It’s also helpful to have a bucket and towels on hand in case of spills.
-
Q3: How long does it take to install a ceramic toilet?
A3: Installing a ceramic toilet can take about 2 to 4 hours, depending on experience and the specific setup. Be sure to factor in additional time for any potential complications.
-
Q4: What can go wrong during toilet installation?
A4: Common issues during toilet installation include leaks from the wax ring, misalignment of the toilet bowl, and difficulties securing the tank. It’s crucial to follow the installation steps carefully to avoid these problems.
-
Q5: Can I install a ceramic toilet by myself?
A5: Yes, many people can install a ceramic toilet themselves, especially if they have some handyman skills. However, if you’re unsure, it’s wise to consult a professional to ensure it’s done correctly.
-
Q6: Do I need to replace the flange when installing a new toilet?
A6: It’s recommended to replace the flange if it’s damaged or corroded. A secure flange is critical for proper toilet installation and to avoid future leaks.
-
Q7: How do I get rid of odors after installing a toilet?
A7: If odors persist after installation, check for leaks in the wax seal, ensure the tank and bowl are securely fitted, and examine your plumbing vents for blockages.
-
Q8: What height should I position my ceramic toilet?
A8: Standard toilet height is about 15 inches from the floor to the top of the seat. However, comfort height toilets are often 17 to 19 inches tall, making them easier for some individuals to use.
Eksterne skakels
- Step-by-Step Toilet Installation Guide – This Old House
- How to Install a Toilet – Family Handyman
- How to Install a New Toilet – The Home Depot
- Frequently Asked Questions About Toilet Installation – Plumbing Uncle
- Toilet Installation Guide – Hunker
- How To Install A New Toilet – Ask This Old House
- How to Lay Tile – Install a Ceramic Tile Floor In the Bathroom
- Rules for Installing a Toilet on the Tiled Floor – Fabalabse